.JPG)
===================================================

Secret Weapon is a well-loved sponsor of the NOVA Open so
I figured I would be appropriate here.
Hello All,
Here we are with the final installment of this tutorial. I hope you enjoy it...
History
Now that the oil paint has had a chance to dry you are
ready for a quick dry brush of Apple Barrel Granite Gray just to bring the
subtle details back up again
 |
| before and after Drybrush |
Paints used
Minitaire Base Grey
Minitaire Irradiated Yellow
Minitaire Raven Black

Vallejo Golden Yellow

QuickShade Dark Tone
Secret Weapon soft Body Black

Apple Barrel Pewter Grey
Americana Slate Grey
Apple Barrel Granite Gray

Folkart Soft White

Citadel Shade Seraphim Sepia

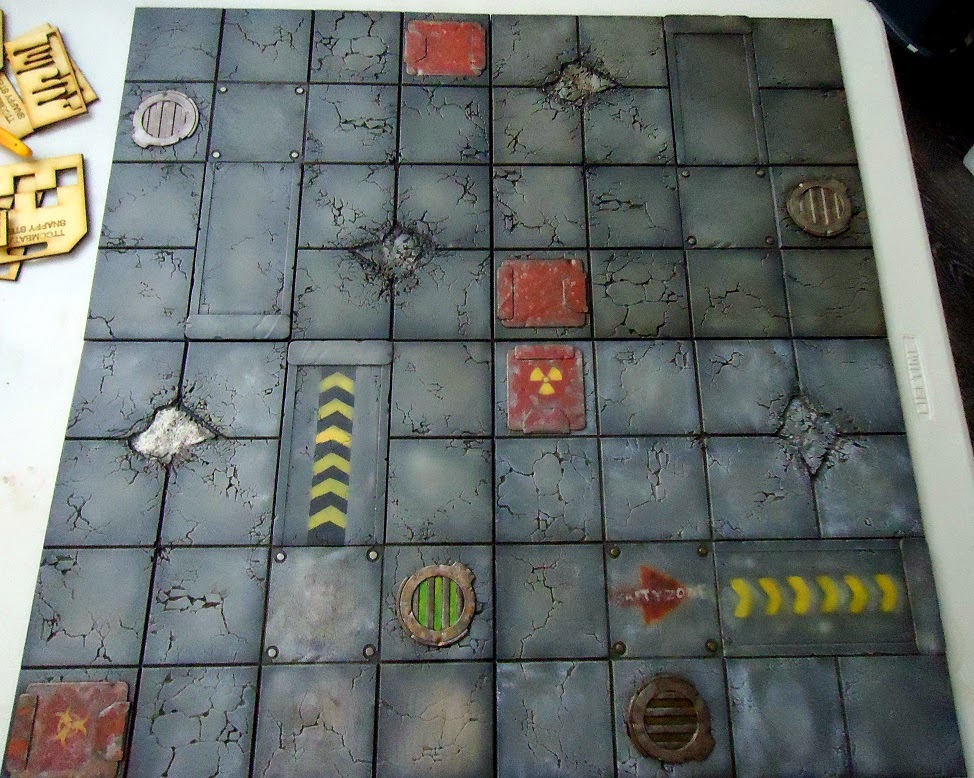
Here are 2 shots of the board at this stage just to make
sure the coloring is close enough. (Waiting
several months between painting sessions has its drawbacks)


Once I was satisfied I used Vallejo Golden Yellow
Airbrush paint to add the Radiation and Bio symbols on the red hatches.

At this point I found myself in a dilemma. There was
something I did not like about the board. Every time I looked at I thought something was not right.
Then it hit me. The arrows! Those damn yellow arrows. They had to go.

So I masked off the space and painted it Minitaire Base
Grey.


Once dry I went over it again with Minitaire Irradiated
Yellow


Then the masking tape went on in… you guessed it. Stripes!


Lastly I went over it with Minitaire Raven Black


Once the tape was removed the “Caution Zone” starts to
take shape.

Of course there was some bleed. I could have gone back
and repainted the bad spots but honestly I did not want to risk screwing it up
so I decided to try texture (sand. Good old sand) I made spots that I hoped
resembled small rubble piles over the bad spots. I then added a few more in
random spaces to make it look less planned.


I painted the sand by washing each spot with a mix of
QuickShade Dark Tone & Secret Weapon soft Body Black

I used the same colors as on the base of the board: Apple
Barrel Pewter Grey, Americana Slate Grey, and Apple Barrel Granite Gray. I then
did a light drybrush of Folkart Soft White just to make it “pop”


Lastly I went back in with Seraphim Sepia to the cracks
of the “Caution Zone” so they would stick out with the yellow.

Well that’s it. I
hope… What? What does it look like all together?
Take a look.


I hope you have enjoyed this tutorial of the Dead Zone
board by Secret Weapon Miniatures. If So
I might do another for the “Junk Yard” board I also got with the kickstarter…
Till next time
RGH